Web SDK Guide
Overview
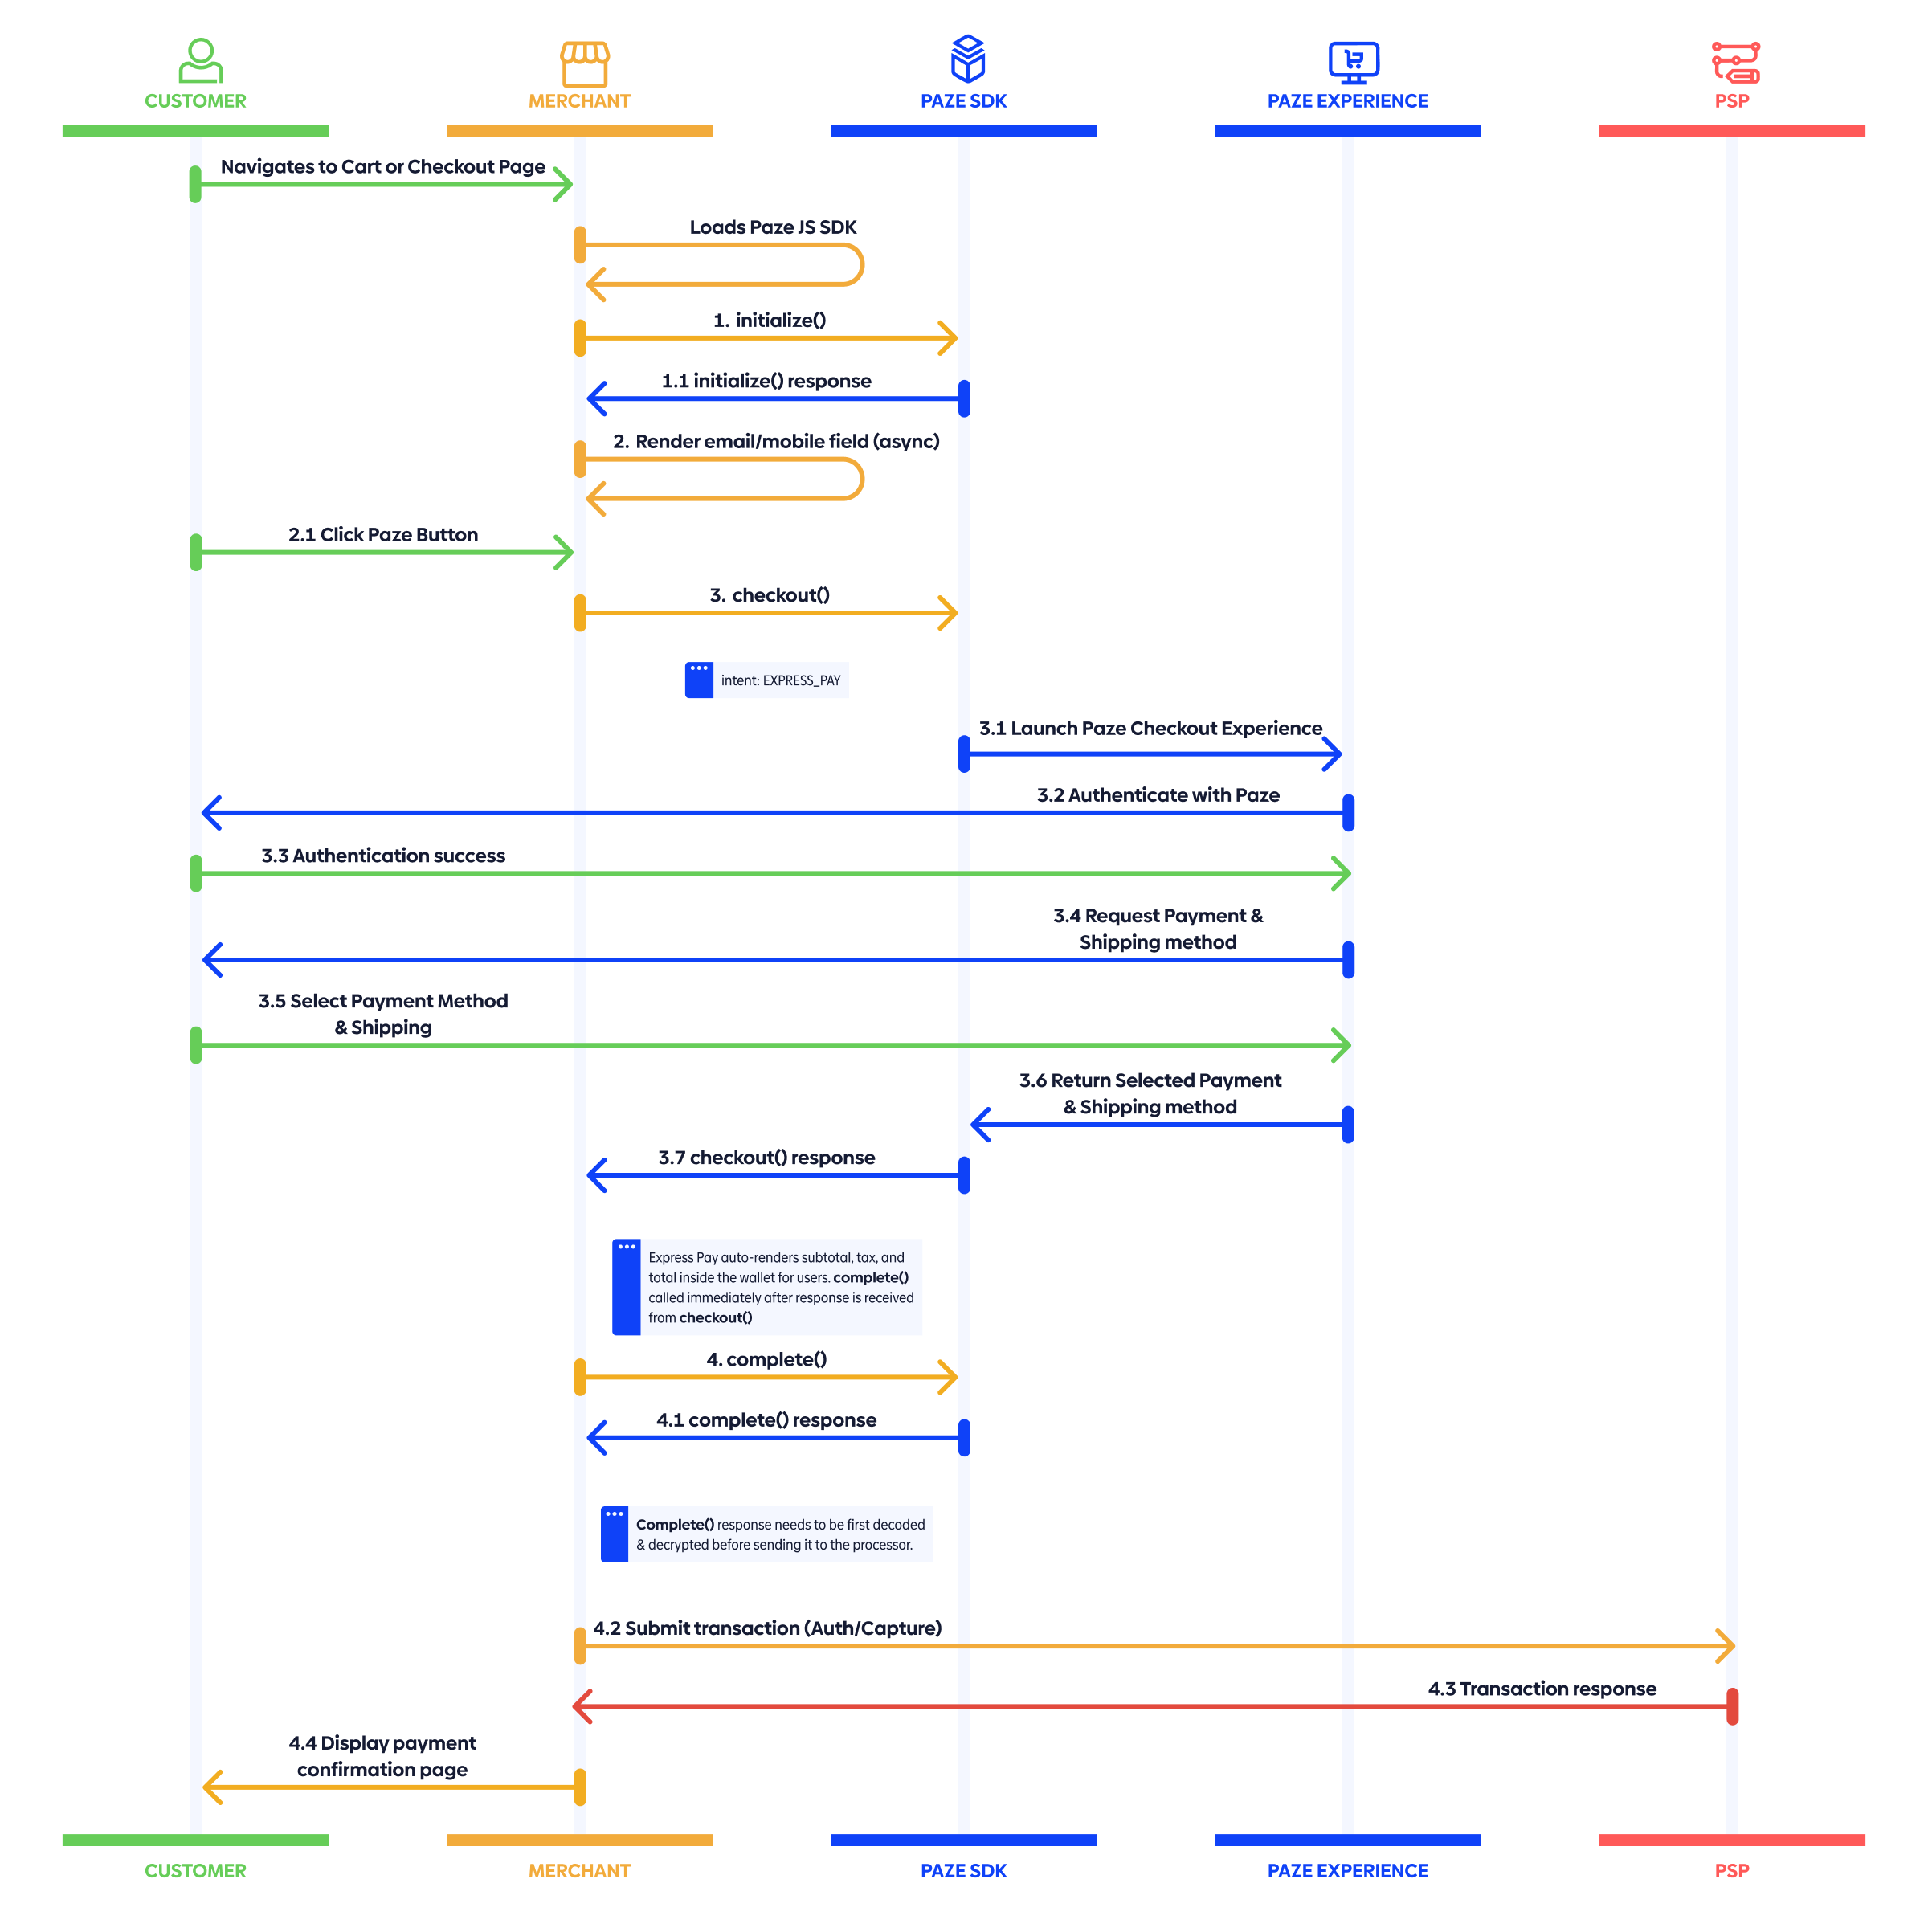
This guide walks through integrating Paze® Button within your checkout experience with an Express Pay checkout flow. This flow allows Customers to select their payment method, review their total, and complete payment directly within the Paze wallet, eliminating the need to return to the Merchant site for confirmation and helping reduce checkout drop-off. Watch the video below to understand the interactions between your Customer, your Server, the Paze JS SDK, the Paze Server, and the Payment Processor.
At a high level, the sequence includes:
- Initializing the SDK
- Integrating the Paze Button
- Launching the Paze Checkout Flow on Button Click
- Handling requests and responses
- Completing the transaction
Sequence Diagram
The following sequence diagram illustrates how the Merchant site, Paze SDK, and Paze Experience interact during this process. It’s meant as a quick reference to understand the end-to-end flow before a deep dive into the sequence diagram and detailed integration steps.
Integrating Express Pay
Use the following steps to integrate the Express Pay flow and associated Button from the Paze SDK:
Each step includes what is happening, why it matters, when to implement, and best practices.
1. Load: Include the Paze SDK using the script tag
<!-- Paze SDK (choose environment) -->
<!-- 0. Sandbox -->
<script src="https://checkout.wallet.cat.earlywarning.io/web/resources/js/digitalwallet-sdk.js"></script>
<!-- 1. Production -->
<!-- <script src="https://checkout.paze.com/web/resources/js/digitalwallet-sdk.js"></script> -->
WHAT: Load the Paze SDK. It attaches a global object to the window named
DIGITAL_WALLET_SDK. The Merchant later reads from that global object in the JavaScript code. (in Part 2)WHY: You need the SDK available before you can
initialize(), call functions, or launch the Paze Checkout Experience.WHEN: Add the
<script>tag once per page where the button would be rendered, usually the checkout pages.BEST PRACTICES: Include exactly one environment (sandbox or prod) on your checkout pages with the Paze Button.
2. Initialize: Configure the Paze SDK using initialize()
const paze = window.DIGITAL_WALLET_SDK;

await paze.initialize({
  client: {
    // Required
    id: "YOUR_CLIENT_ID", // Required: assigned by Paze Distributor
    profileId: "YOUR_PROFILE_ID", // Required: assigned by Paze Distributor
    name: "YOUR_MERCHANT_DISPLAY_NAME", // Recommended: Customer-friendly name associated with Merchant site the Customer is shopping on
  },
});
WHAT: You create a configured SDK instance tied to your Merchant identifier. After the await resolves, the SDK is ready. The
client.idis the Merchant's assigned identifier at onboarding. Theclient.profileIdis also assigned during onboarding. Both of these values are issued by Paze.WHY:
initialize()authenticates and scopes all subsequent calls to your Merchant profile.WHEN: This should be called once on page load to avoid Customer experience delays.
BEST PRACTICES: On Error, fail gracefully; do not block the native checkout flow on fail.
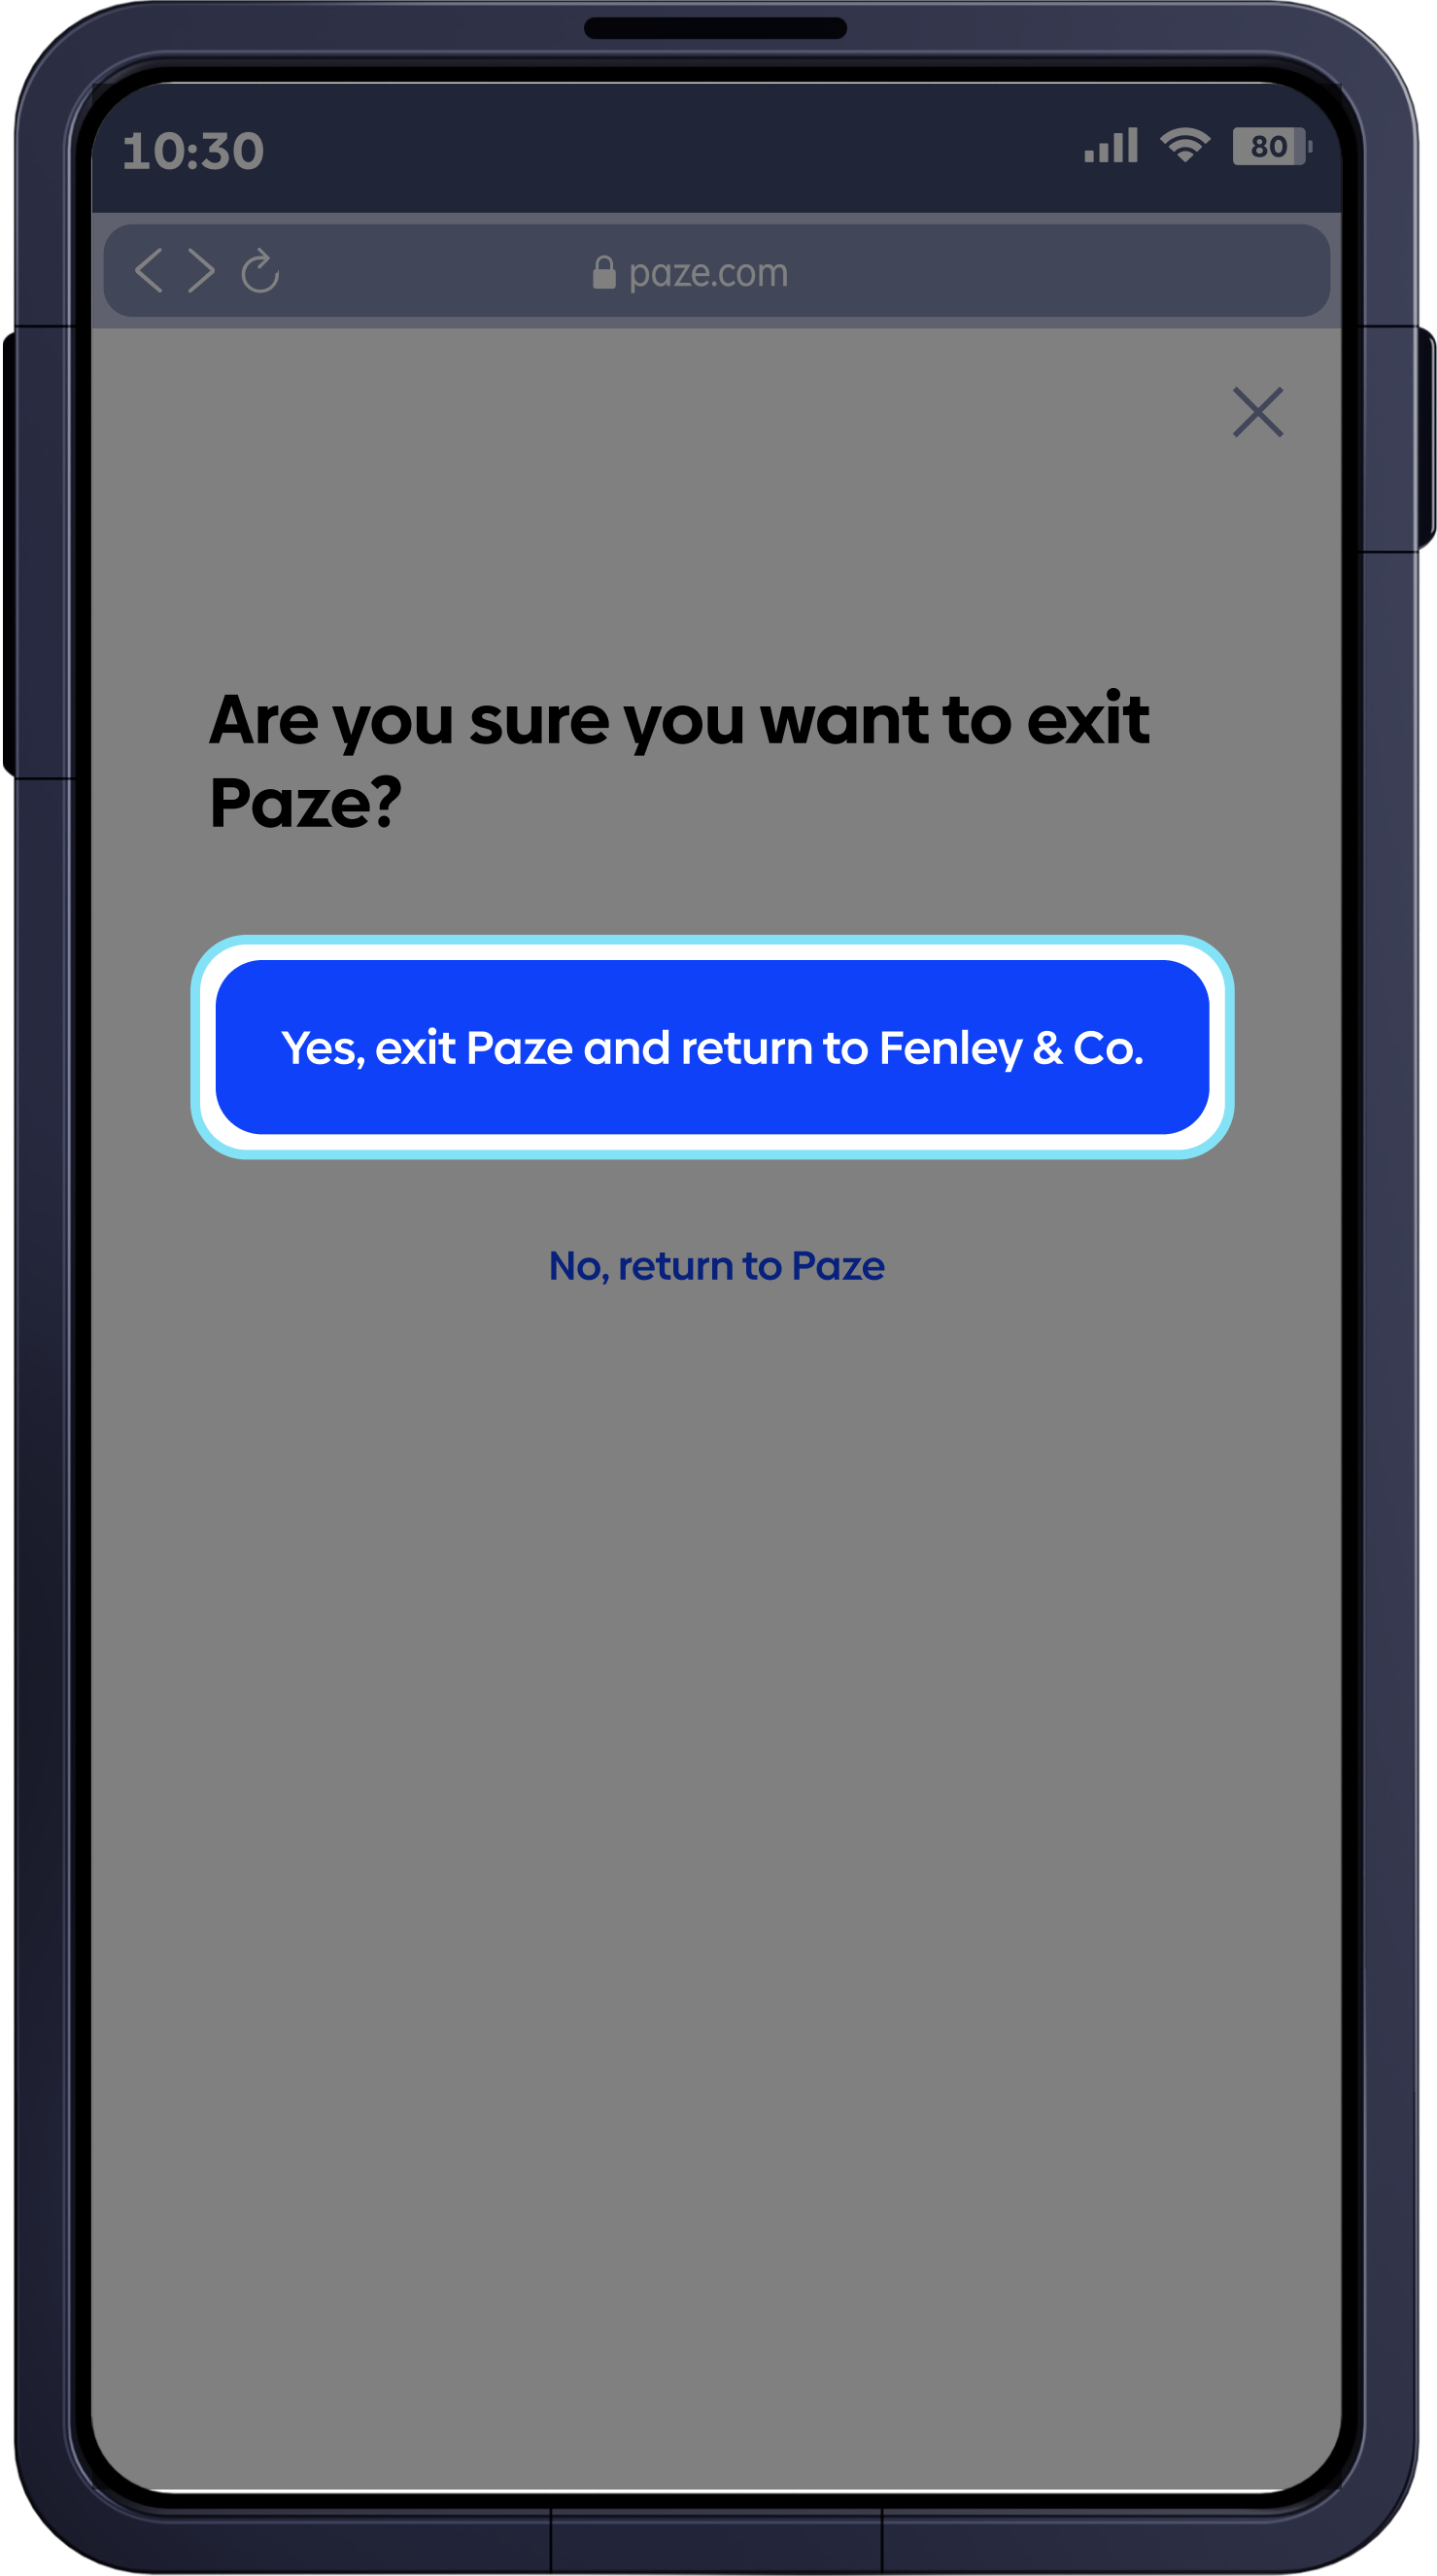
client.nameis rendered if available, else the default used is “Merchant.” In this example “Fenley & Co” is theclient.name. This should be a consumer-friendly name associated with the Merchant site they are shopping on.
Examples with client.name set to Fenley & Co.

3. Render button: Display the Paze Button adhering to brand guidelines
Merchants render the Paze Button using the Paze JavaScript SDK’s custom HTML element, <paze-button>. The SDK provides a fully compliant, branded Paze button out of the box and handles styling, sizing, and logo placement automatically. Merchants should place the button wherever wallet options are presented in the checkout experience (for example, cart, product detail, or checkout pages). Optional attributes such as color, shape, and label may be used to align with the Merchant's UI while remaining compliant with Paze brand and UX guidelines.
<paze-button id="pazeBtn"></paze-button>
Note: For approved variants, consult the Integrate Button guide.
WHAT: Render the Paze Button on your checkout pages using the SDK-provided
<paze-button>element. This button allows Customers to initiate the Paze checkout experience by clicking.WHY: The button offers a Customer-driven entry point into the Paze experience.
WHEN: Render the button whenever you surface payment options in your checkout experiences. The Paze Button should always be rendered after the initialization step to ensure a smooth launch experience.
BEST PRACTICES: Use the SDK-provided
<paze-button>without recreating or restyling the button manually. Optional attributes may be used as documented. The button should only be rendered afterinitialize()has completed so thatcheckout()can be successfully invoked.
4. Checkout: Launch the Paze Wallet on button click using checkout()
// on click event for the paze button
pazeBtn.addEventListener("click", async () => {
  const checkoutResponse = await paze.checkout({
    // Identity and session
    emailAddress: "[email protected]", // Optional: Used to prefill Customer info for seamless login
    mobileNumber: "CUSTOMER_MOBILE_NUMBER", // Optional: Used to prefill Customer info if available
    sessionId: "YOUR_SESSION_ID", // Recommended: same value per session that is used to link the transaction in your system

    // Flow control (this is for modifying how the Paze Experience works)
    actionCode: "START_FLOW", // Optional: START_FLOW (default and option required for Express Pay Flow)
    intent: "EXPRESS_CHECKOUT", // Required: EXPRESS_CHECKOUT required for this flow.
    // Amount to display
    transactionValue: {
      // Recommended: as it renders subtotal in Paze Experience
      transactionCurrencyCode: "USD", // Conditional with transactionValue
      transactionAmount: "149.99", // Conditional with transactionValue
    },

    // Address and card controls
    shippingPreference: "ALL", // Optional: ALL (default) | NONE
    billingPreference: "ALL", // Optional: ALL (default)
  });

  // checkoutResponse → { result: "COMPLETE" | "INCOMPLETE", checkoutResponse?: "<JWS>" }
});
WHAT:
checkout()results in the launching of the Paze UI conditionally. Thischeckout()call only occurs when the Paze button is clicked. Paze then passes identity, session data, and controls that tune the flow: intent, card/address preferences, accepted networks, etc. Within the UI, the buyer authenticates and selects the payment method. The call resolves with a result ofCOMPLETEorINCOMPLETEand a <JWS> on success.WHY: This is the actual Customer interaction where they authenticate and select payment method inside the wallet.
WHEN: On button click. This should only be called after
initialize().BEST PRACTICES: You should reuse the same
sessionIdthroughoutcheckout(). Keep the flow as minimal as possible and only pass the options that you need. Handle theINCOMPLETEresponse by falling back to the normal Merchant checkout flow. Restore focus to your checkout form to return to your native flow to avoid Customer dead-ends. Storing the last four digits returned for future reference on the payment confirmation and email pages is also recommended.
Response to a checkout() call
checkout() returns a result of COMPLETE or INCOMPLETE and if complete the response contains a JSON Web Signature (JWS) called checkoutResponse. The checkoutResponse object contains information that can be used to pre-populate a Merchant’s confirmation page. This checkoutResponse JWS can be decoded with a Base64 decoder.
checkout() Response
{
  "result": "COMPLETE", // Required: String (Enum: COMPLETE | INCOMPLETE)
  "checkoutResponse": "eyJhbGciOi..." // Conditional: only when result === COMPLETE; String (JWS<CheckoutResponse>)
}
Decoded JWS<CheckoutResponse>
{
  "sessionId": "abc123", // Optional: String (echoed if provided)
  "consumer": {
    // Required: Object (Consumer)
    "firstName": "Jane", // Optional: String
    "lastName": "Doe", // Optional: String
    "fullName": "Jane Doe", // Required: String
    "emailAddress": "[email protected]", // Required: String (RFC 5322)
    "mobileNumber": {
      // Optional: Object (PhoneNumber)
      "countryCode": "1", // Required: String (ISD code)
      "phoneNumber": "5551234567" // Required: String
    }
  },
  "maskedCard": {
    // Required: Object (MaskedCard)
    "digitalCardId": "uuid-1234-5678", // Required: String (UUID)
    "panLastFour": "4242", // Required: String (last 4 digits)
    "paymentAccountReference": "PAR1234567890", // Optional: String (PAR)
    "panExpirationMonth": "12", // Conditional: String (MM)
    "panExpirationYear": "2028", // Conditional: String (YYYY)
    "paymentCardDescriptor": "Rewards Plus", // Required: String
    "paymentCardType": "CREDIT", // Required: Enum (CREDIT | DEBIT)
    "paymentCardBrand": "VISA", // Required: Enum (VISA | MASTERCARD | DISCOVER)
    "paymentCardNetwork": "VISA", // Required: Enum (network)
    "digitalCardData": {
      // Required: Object (Digital Card Data)
      "artUri": "https://cdn.paze.com/cardart/visa.png", // Required: URL
      "artHeight": 48, // Required: Number (px)
      "artWidth": 76 // Required: Number (px)
    },
    "billingAddress": {
      // Conditional: Object (Address)
      "line1": "123 Main St", // Required: String
      "city": "Phoenix", // Required: String
      "state": "AZ", // Required: String
      "zip": "85001", // Required: String
      "countryCode": "US" // Required: String (ISO 3166-1 alpha-2)
    }
  },
  "shippingAddress": {
    // Conditional: Object (ShippingAddress)
    "name": "Jane Doe", // Required: String
    "line1": "123 Main St", // Required: String
    "city": "Phoenix", // Required: String
    "state": "AZ", // Required: String
    "zip": "85001", // Required: String
    "countryCode": "US", // Required: String (ISO 3166-1 alpha-2)
    "deliveryContactDetails": {
      // Optional: Object
      "contactPhoneNumber": {
        // Optional: Object (PhoneNumber)
        "countryCode": "1", // Required: String
        "phoneNumber": "5551234567" // Required: String
      },
      "contactFullName": "Jane Doe" // Optional: String
    }
  }
}
5. Complete: Finalize the transaction using complete()
const completeResponse = await paze.complete({
  // Transaction semantics
  transactionType: "PURCHASE", // Required: "PURCHASE" | "CARD_ON_FILE" (store/manage for later use) | "BOTH" (CARD_ON_FILE + PURCHASE)
  sessionId: "YOUR_SESSION_ID", // Recommended: same value per session

  transactionValue: {
    // Conditional: Required if transactionType is "PURCHASE" or "BOTH"
    transactionCurrencyCode: "USD", // Required with transactionValue
    transactionAmount: "149.99", // Required with transactionValue
  },

  // Output behavior
  transactionOptions: {
    // Optional
    payloadTypeIndicator: "PAYMENT", // Optional: "ID" (return only an ID) | "PAYMENT" (return JWE now)
    billingPreference: "ALL", // Optional: "ALL" | "NONE"
  },

  // Additional metadata (used for Paze Fraud Liability Shift Program)
  enhancedTransactionData: {
    // Optional
    ecomData: {
      cartContainsGiftCard: false, // Optional: Boolean
      orderForPickup: false, // Optional: Boolean
      orderQuantity: "2", // Optional: String (max length 10)
      orderHighestCost: "89.99", // Optional: String (max length 10)

      finalShippingAddress: {
        // Optional: Address object
        name: "Jane Doe", // Optional: String (max length 100)
        line1: "123 Main St", // Conditional: Returned if billingPreference is ALL
        line2: "Apt 4B", // Optional
        city: "Phoenix", // Conditional: Returned if billingPreference is ALL
        state: "AZ", // Conditional: Returned if billingPreference is ALL
        zip: "85001", // Required
        countryCode: "US", // Required (ISO 3166-1 alpha-2)
      },
    },
  },
});

// completeResponse → { completeResponse: "<JWS containing payloadId[, securedPayload]>" }
WHAT: You ask the SDK to finalize and return the payment payload that your payment processor needs. Your promise resolves with a
completeResponse: <JWS> that contains thesecuredPayload.WHY:
complete()gives you the tokenized, signed result that is needed for your payment processor.WHEN: Immediately after Express Pay
checkout()completes and you are ready to submit the order to your payment processor.BEST PRACTICES: Idempotency: include/track so retries do not double-charge. Retries should not use the same cryptogram from Paze. Include any
enhancedTransactionDatathat your risk or processor flows use. On error, fallback to your standard payment methods to avoid Customer drop-off.
Response to complete() Call
complete() response contains a JSON Web Signature completeResponse which can be verified with Paze public key for authenticity, then decoded with a Base64 decoder. This contains the sessionId which matches the other calls in this session. The securedPayload is a JSON Web Encryption (JWE) that is encrypted and must be decrypted with the Merchant's private key associated with the certificate provided by the Merchant during onboarding. This object contains the data needed for your payment processor to process the transaction. The dynamic data cryptogram is sent by the Merchant to the payment processor and is valid for 24 hours.
complete() Response
completeResponse is a JWS (JSON Web Signature) containing the signed response payload.
{
  "completeResponse": "eyJhbGciOi..." // Required: String (JWS<CompleteResponse>)
}
BEST PRACTICES: We strongly recommend that you send the contents of the
completeResponseto your server for decoding and decryption.
Decoded completeResponse
After receiving the completeResponse JWS, first decode it to extract the JSON payload containing payloadId, sessionId, and optionally securedPayload.
{
  "payloadId": "txn-7890-1234", // Required: String (≤ 50 chars)
  "sessionId": "YOUR_SESSION_ID", // Optional: String (echoed if provided)
  "securedPayload": "eyJhbGciOi..." // Conditional: String (JWE<JWS<Payload>>)
}
Decrypted securedPayload
Decrypt the securedPayload using your Merchant's private key. The decrypted payload contains sensitive information necessary for you to process the transaction.
{
  "clientId": "merchant-12345", // Required: String
  "profileId": "profile-6789", // Required: String
  "eci": "05", // Optional: String (ECI code)
  "consumer": {
    // Required: Object (Consumer)
    "fullName": "Jane Doe", // Required: String
    "emailAddress": "[email protected]" // Required: String (RFC 5322)
  },
  "billingAddress": {
    // Conditional: Object (Address)
    "line1": "123 Main St", // Required: String
    "city": "Phoenix", // Required: String
    "state": "AZ", // Required: String
    "zip": "85001", // Required: String
    "countryCode": "US" // Required: String (ISO 3166-1 alpha-2)
  },
  "token": {
    // Required: Object (Token)
    "paymentToken": "[Removed]", // Required: String (network token)
    "tokenExpirationMonth": "12", // Required: String (MM)
    "tokenExpirationYear": "2028", // Required: String (YYYY)
    "paymentAccountReference": "PAR1234567890" // Optional: String (PAR)
  },
  "paymentCardNetwork": "VISA", // Required: Enum (VISA | MASTERCARD | DISCOVER)
  "dynamicData": [
    // Required: Array<DynamicData>
    {
      "dynamicDataType": "PURCHASE", // Required: Enum (PURCHASE | CARD_ON_FILE)
      "dynamicData": "CiAgICAg...", // Required: String (cryptogram) This is sent to the payment processor as is and is not decrypted by the Merchant. The cryptogram is valid for 24 hours.
      "dynamicDataExpiration": "2025-12-31T23:59:59Z" // Optional: String (ISO 8601)
    }
  ]
}
Testing and Error Handling
Environments
- Sandbox (Test) – full wallet flows for integration/QA
- Use Paze-provided test-accounts (emails / mobile numbers) that simulate various Customer states
- Test Data Includes:
- Different card networks (Visa, Mastercard, Discover)
- Production – live environment, only after certification and approval.
Testing Recommendations
initialize()once and reuse the same sessionId acrosscheckout()andcomplete().- Session timeout: Wallet warns after 6 min, expires after 8 min. Require new session.
- Positive test cases:
- Eligible wallet launches immediately and completes checkout
- Multiple cards: verify card selection
- Multiple addresses: verify shipping selection
- Button click calls
checkout()and launches the Paze Experience - Action codes for
checkout():START_FLOW: launch Paze ExperienceCHANGE_CARD(if used): render card selection screenCHANGE_SHIPPING_ADDRESS(if used): render address selection screen
Error Handling
- Initialization errors: continue normal Merchant checkout.
- Ineligible consumer: no popup; continue normal Merchant checkout.
- Customer cancel /
INCOMPLETE: no popup; continue normal Merchant checkout. - Timeout: wallet closes; require Customer to retry with new session.
complete()errors: allow retry with new idempotency key.
Paze SDK Error Response Object
The error response object contains both a reason and a message. The reason is intended for Merchant logic to process and handle the issue while the message is intended for human readability and manual debugging or logging. There is an optional array of objects called details that adds specificity to the issue if needed. This details array contains an XPath pointer to the source of the error with a human-readable error message.
{
  "reason": "ERROR_CODE", // Required: String used for Merchant error-handling logic
  "message": "This describes the error", // Optional: String for human-readable logging/debugging only
  // Optional: List(Object) of data validation errors
  "details": [
    {
      "location": "Failure pointer", // Required: String XPath or path to failure
      "message": "Specific error for field" // Optional: String specific error for field
    }
  ]
}
For more information on error response objects, see Errors.
Updated 16 days ago