Offers Messaging Placement
Paze provides customizable messaging and checkout experiences to support Paze-specific offer campaigns. Offer content and calls to action can appear on three primary surfaces:
- A message container rendered using the
<paze-message>custom HTML element - A message in the auto-initiate flow
- A customized checkout review screen based on merchant inputs
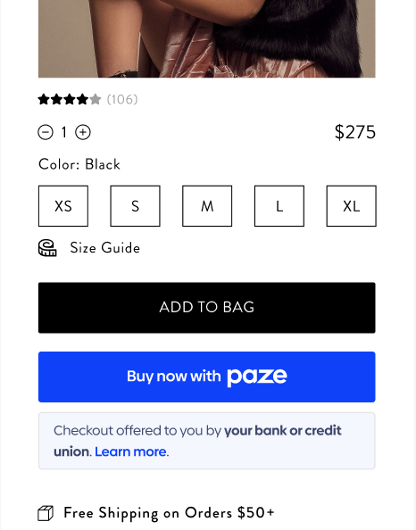
Message Container Placement (<paze-message>)
<paze-message>)- Paze provides a custom HTML element,
<paze-message>, that merchants can place anywhere on their page layout. When the Paze JavaScript SDK is initialized, this element is replaced with offer messaging configured for that merchant.
Typical placement pattern (current common use case):
- Directly under or near the Paze checkout button or radio button on:
- Product detail pages
- Cart pages / mini-carts
- Checkout pages
This placement keeps the offer messaging visually connected to the Paze call-to-action and performs well for most merchants.
Important:
The <paze-message> element is not limited to being under the button. It can be placed anywhere that makes sense for your UX—for example:
- Above or beside a price or savings summary
- In a sidebar or promotional panel
- Near shipping or delivery options
As long as the Paze JS SDK is loaded and
initialize()has been called, the SDK will: - Use the merchant identifiers and any
<paze-message>attributes (likemessage-placement) - Retrieve the configured message, and
- Replace the tag with the appropriate HTML message (or hide it if no active message exists) Note: For attribute details and code samples, see Implementing Offers Messaging (recommended next step).
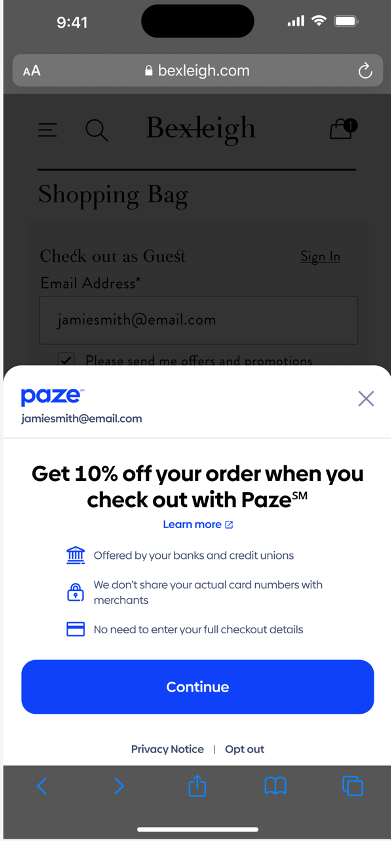
Messages in the Auto-Initiate Flow
For merchants that use the auto-initiate experience, Paze can display offer messaging directly within the auto-initiate launch screen.
- Merchant work required: none beyond enabling auto-initiate.
- Example message: “Get 10% off by checking out with Paze!”
Offer copy, timing, and eligibility are managed by Paze and can be updated without merchant code changes.
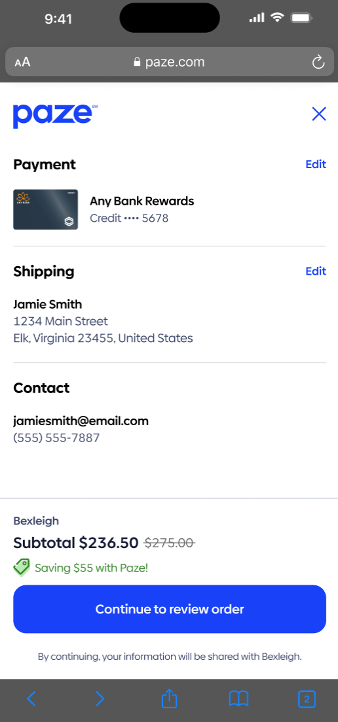
Customized Checkout Screen Based on Merchant Inputs
To carry the offer experience through to the final review screen, merchants are encouraged (but not required) to provide additional discount-related inputs in the transactionValue object of the checkout() call.
These inputs can be used to:
- Show how the discount was applied
- Break down subtotal, tax, and shipping
- Align the Paze checkout review screen with how the merchant presents totals on their own site
New fields used for checkout customization (all optional, but recommended when running offers):
discountAmount– The amount discounted from the subtotalsubtotal– Total before discounts, tax, and shippingtaxAmount– Tax applied to the transactionshippingAmount– Shipping cost (for example, “FREE” when 0.00)
These are provided inside the transactionValue object, which is nested within the checkout() call. Users then authenticate and select a card within the Paze checkout UI.
For validation rules and full examples, see Implementing Offers Messaging / the JS SDK transactionValue reference.
What’s Next
After reviewing where offer messages can appear:
- Go to Implementing Offers Messaging for:
<paze-message>attribute reference and code samplestransactionValuefield requirements and examples
- Review the Offers Messages object documentation for additional technical details on offer message configuration.
Updated 27 days ago